If you want to be successful on Instagram, you really need to improve your graphic design skills and create compelling visual content. Users might forgive awkward pictures on Instagram Stories or typing the shrug emoji, but your profile pictures need to be inspiring, creative and stand out to grab your customers’ attention. After all, you want your followers to be real people and not bots, don’t you?
In this article, we’ve focused on 3 quite simple tools to create original, interesting, and high-quality visual content for your Instagram profile. Of course, all of these tools can create layouts for Facebook and for many other sources of content distribution.
If you are not drawn to design and have never worked with Photoshop, don’t worry. We will give a quick guide to the key function of each tool.
Canva
Taking or finding great photos for your Instagram posts is only half of all the work. Besides that, you need to motivate your followers to be active using call-to-action.
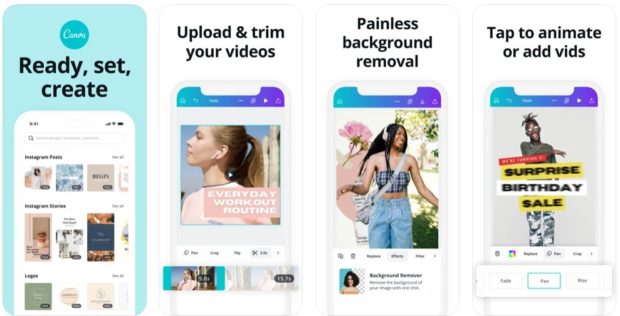
With Canva, you can make many marketing materials, from blog graphics to ebook covers, layouts, brochures, banners, and more. But we will focus on how to use the Instagram tool.
The best thing about Canva is its simplicity. It only takes you a few minutes to create a new image/photo/template.
With Canva, you can:
- add visual elements to your photo posts that grab the attention of your followers;
- create a photo collage;
- make icons for Highlights (pinned stories);
- make a template for use in the feed with overlapping different inscriptions and quotes (perfect for informational content and posts like “5 myths about …”, “worth knowing,” “expert advice”).
Keep in mind: while making a draft, pay attention to the “free” labels on the elements. If you select a paid item (it usually has a $ icon on it), you will be prompted to pay for the item or switch to a premium account upon download. Otherwise, you can download your draft in any format you need: PNG, JPG, PDF, and even GIF animations for stories.
When you pay for a premium account ($ 12.95 per month), Canva gives you more options for your business accounts. It becomes possible to connect a team to the profile that can simultaneously work on templates and layouts. You can also add the brand book’s most important elements: corporate colors, logo, and fonts.
Canva’s pros:
- a large number of templates and elements;
- free version with the ability to purchase premium graphic elements for $ 1.00 each (icons, backgrounds, fonts);
- the ability to upload your own photos to Canva;
- Canva automatically saves your work every few seconds, so you don’t have to worry about losing content;
- Canva’s drag-and-drop media functionality makes working with it easier than ever;
- export in high quality in various formats: JPEG, PNG, or PDF.
Snapseed
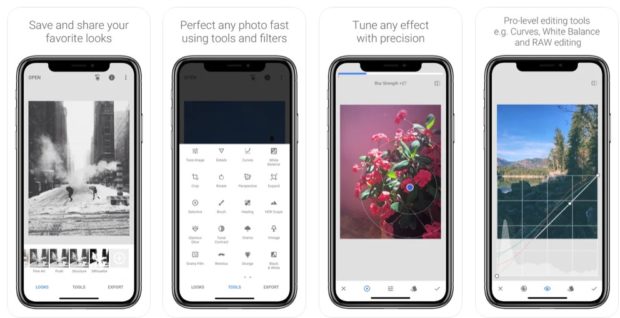
Snapseed is very popular among iPhone and Android users. It is extremely intuitive and easy to use, which has led to its high popularity. In addition to standard editing features such as brightness, cropping, and contrast, Snapseed is also renowned for additional features such as brush, selective adjustments, and perspective.
With Snapseed, you can:
- edit photos by improving lighting, contrast, temperature, saturation;
- fix the “blocked” horizon and align the perspective;
- remove unnecessary elements;
- expand the frame;
- make a double exposure (superimpose and combine two frames).
One of the coolest and trickiest features of Snapseed is the Spot Correction feature. It will help you eliminate any unwanted parts in your photos, such as people, cars, buildings, dust, cigarette butts, or debris that spoils the frame.
To repeat this operation, open the Spot Correction feature in the Tools screen, zoom in on the area you want to remove, and tap or drag your finger over that area. Spot correction does not always remove an object accurately. Snapseed automatically chooses what to put in this place. If you don’t achieve the desired result initially, undo the edits and enlarge the photo, working more delicately with the correction points.
Snapseed pros:
- a large number of functions (apart from Lightroom, no other application can boast of such some correction tools);
- free application without constant pop-ups offering to pay for a premium account;
- quite clear and simple interface (all possible functions are divided into two sections: styles and tools);
- at any time, you can undo one of your corrections without throwing off all edits to the original view of the photo (by the principle of layers in Photoshop);
- Support for loading and working with RAW format.
Cons of Snapseed
- sometimes it is a little difficult to find how to return to the original view of the photo and undo your edits;
- there are some difficulties with uploading photos from iCloud.
VSCO
VSCO is an application that can be used to creatively improve the quality of photos by increasing traffic to your Instagram page.
VSCO competes with many different photography applications in different directions. Moreover, VSCO has its own SERP, where people can post photos. Feeling a hint of competition from Instagram? After all, it also allows you to process photos and share them in the feed. But while Instagram has gone a lot further with its business model, then VSCO is winning the race in many visual styles.
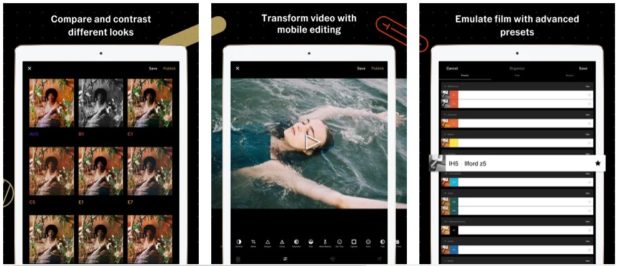
The most important function of VSCO is the use of presets. A preset is a way to save editing settings to apply the same settings to multiple photos easily. These settings include exposure, contrast, highlights, shadows, and more that you can change in your photo. Basically, all of these settings determine how the photo looks.
There are hundreds of different styles on the VSCO page (most of them are paid). The most popular presets used by photographers are the Aesthetic series (A4-A6). The choice of style depends entirely on the concept of your page. Below you can see how applying a filter changes the same photo.
With VSCO (besides applying a specific filter), you can:
- change the main parameters of the photo: exposure, contrast, saturation, temperature;
- correct skin tone;
- edit the video by applying a processing style to it;
- adjust the HSL settings (Hue – hue, Saturation – saturation, Lightness – closeness to white);
- copy and transfer the same settings to multiple photos.

